Intro
After printing the feeder (see previous post) I attempted to reprint it in a different orientation. These are my stories.
Iteration 1: Upside Down
The new orientation seemed like it could be a good idea. The support would be attached to the build plate. And they wouldn't be buried inside of the feeder itself.
It all started out well, even if it was going to be using a lot more filament.
But I ran into issues with my printer. 😭
The thermistor readings varied wildly during the print job. They varied so much that the print ended up shutting down for safety, to prevent thermal runaway.
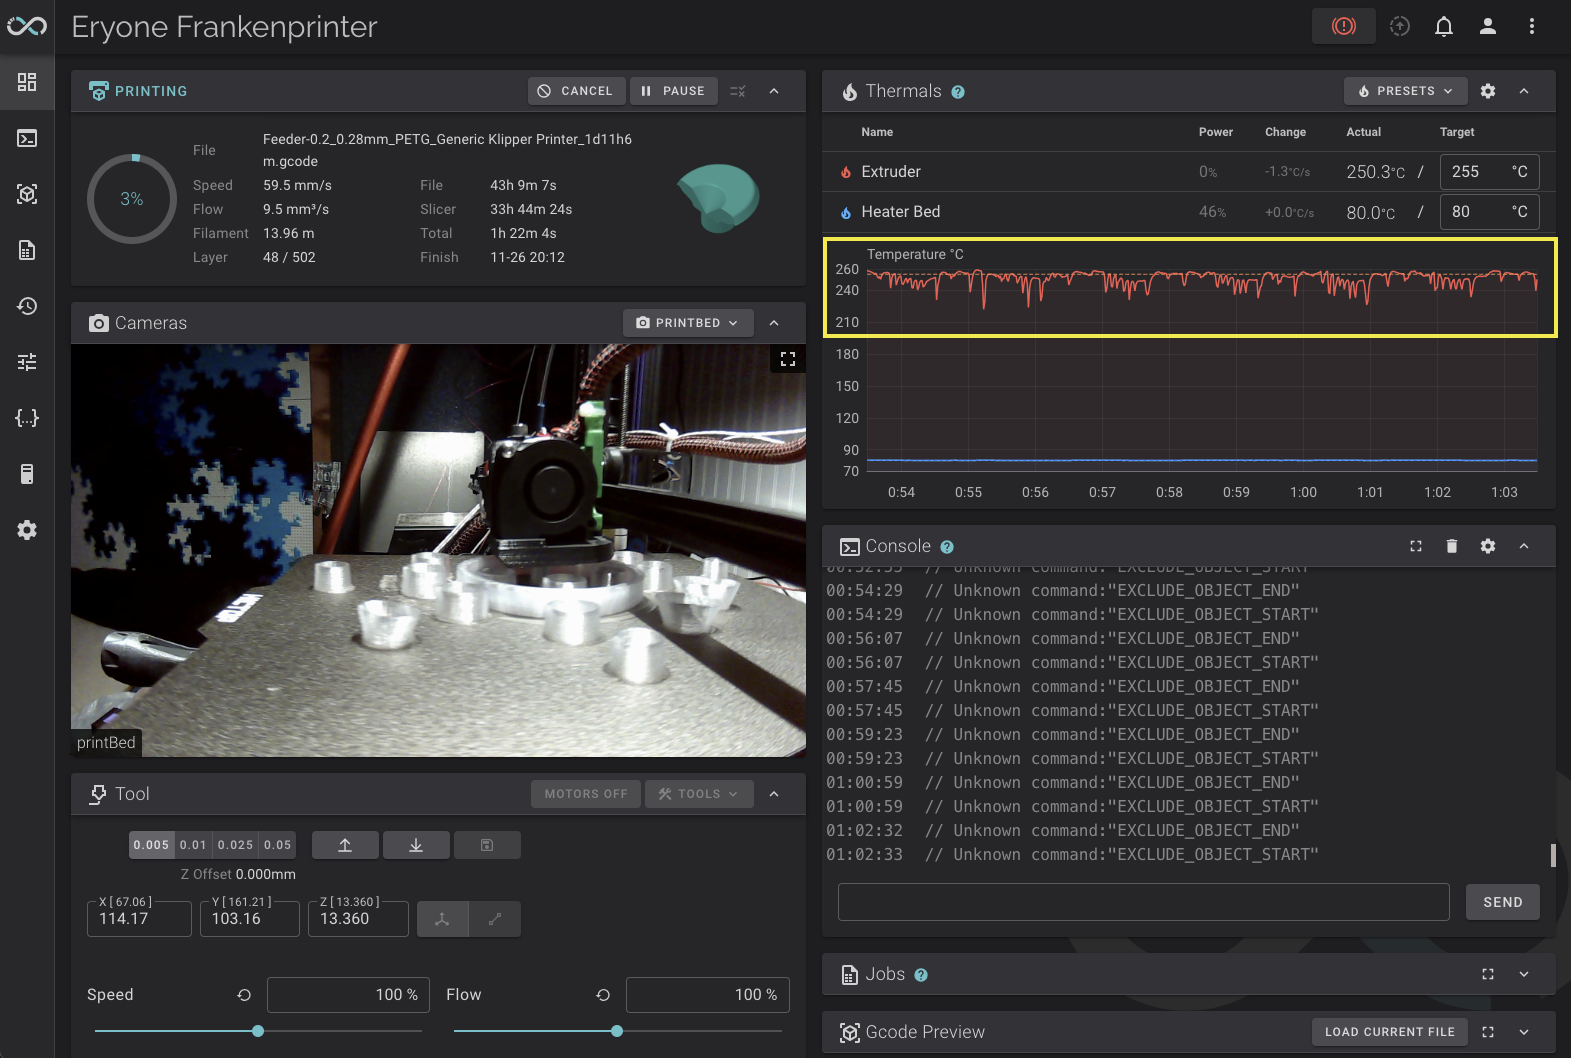
I restarted the printer again and it only made it a few millimeters before it shut down again.
I examined the thermistor cartridge and it ended up coming apart, showing it was definitely damaged which would contribute to the printing issues.
So I had to order the new part and wait. In the meantime we had family over for Thanksgiving and a full schedule of activities while the unfinished print waited on the build plate.
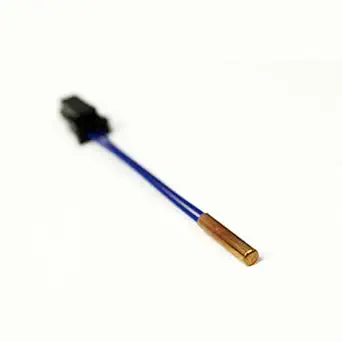
Once I was able, I replaced the thermistor cartridge, which took some time. The plastic had seized the screw that locked the cartridge in place. I ended up having to heat up the block and then back out the screw. Once replaced, I performed PID tuning using the recommended approach in this article. Once that was complete, I used the method outlined in CNC Kitchen's post on resuming prints to restart the print. It resumed, but stopped again soon after. And the temperature graph continued to show the printer wasn't able to maintain the 255°C temperature the PETG required.
I took to the internet to determine the cause, and found this Reddit post with a very important reminder.

Sure enough. The silicone sock was still off after I replaced the thermistor.
I added the silicone sock and boom. It worked!
I was able to get the print to restart. Unfortunately, the layer adhesion was terrible. I think I didn't measure correctly or I didn't update the gcode correctly. I didn't like how the print was oriented and decided to start over.
Iteration 2: Flat Again
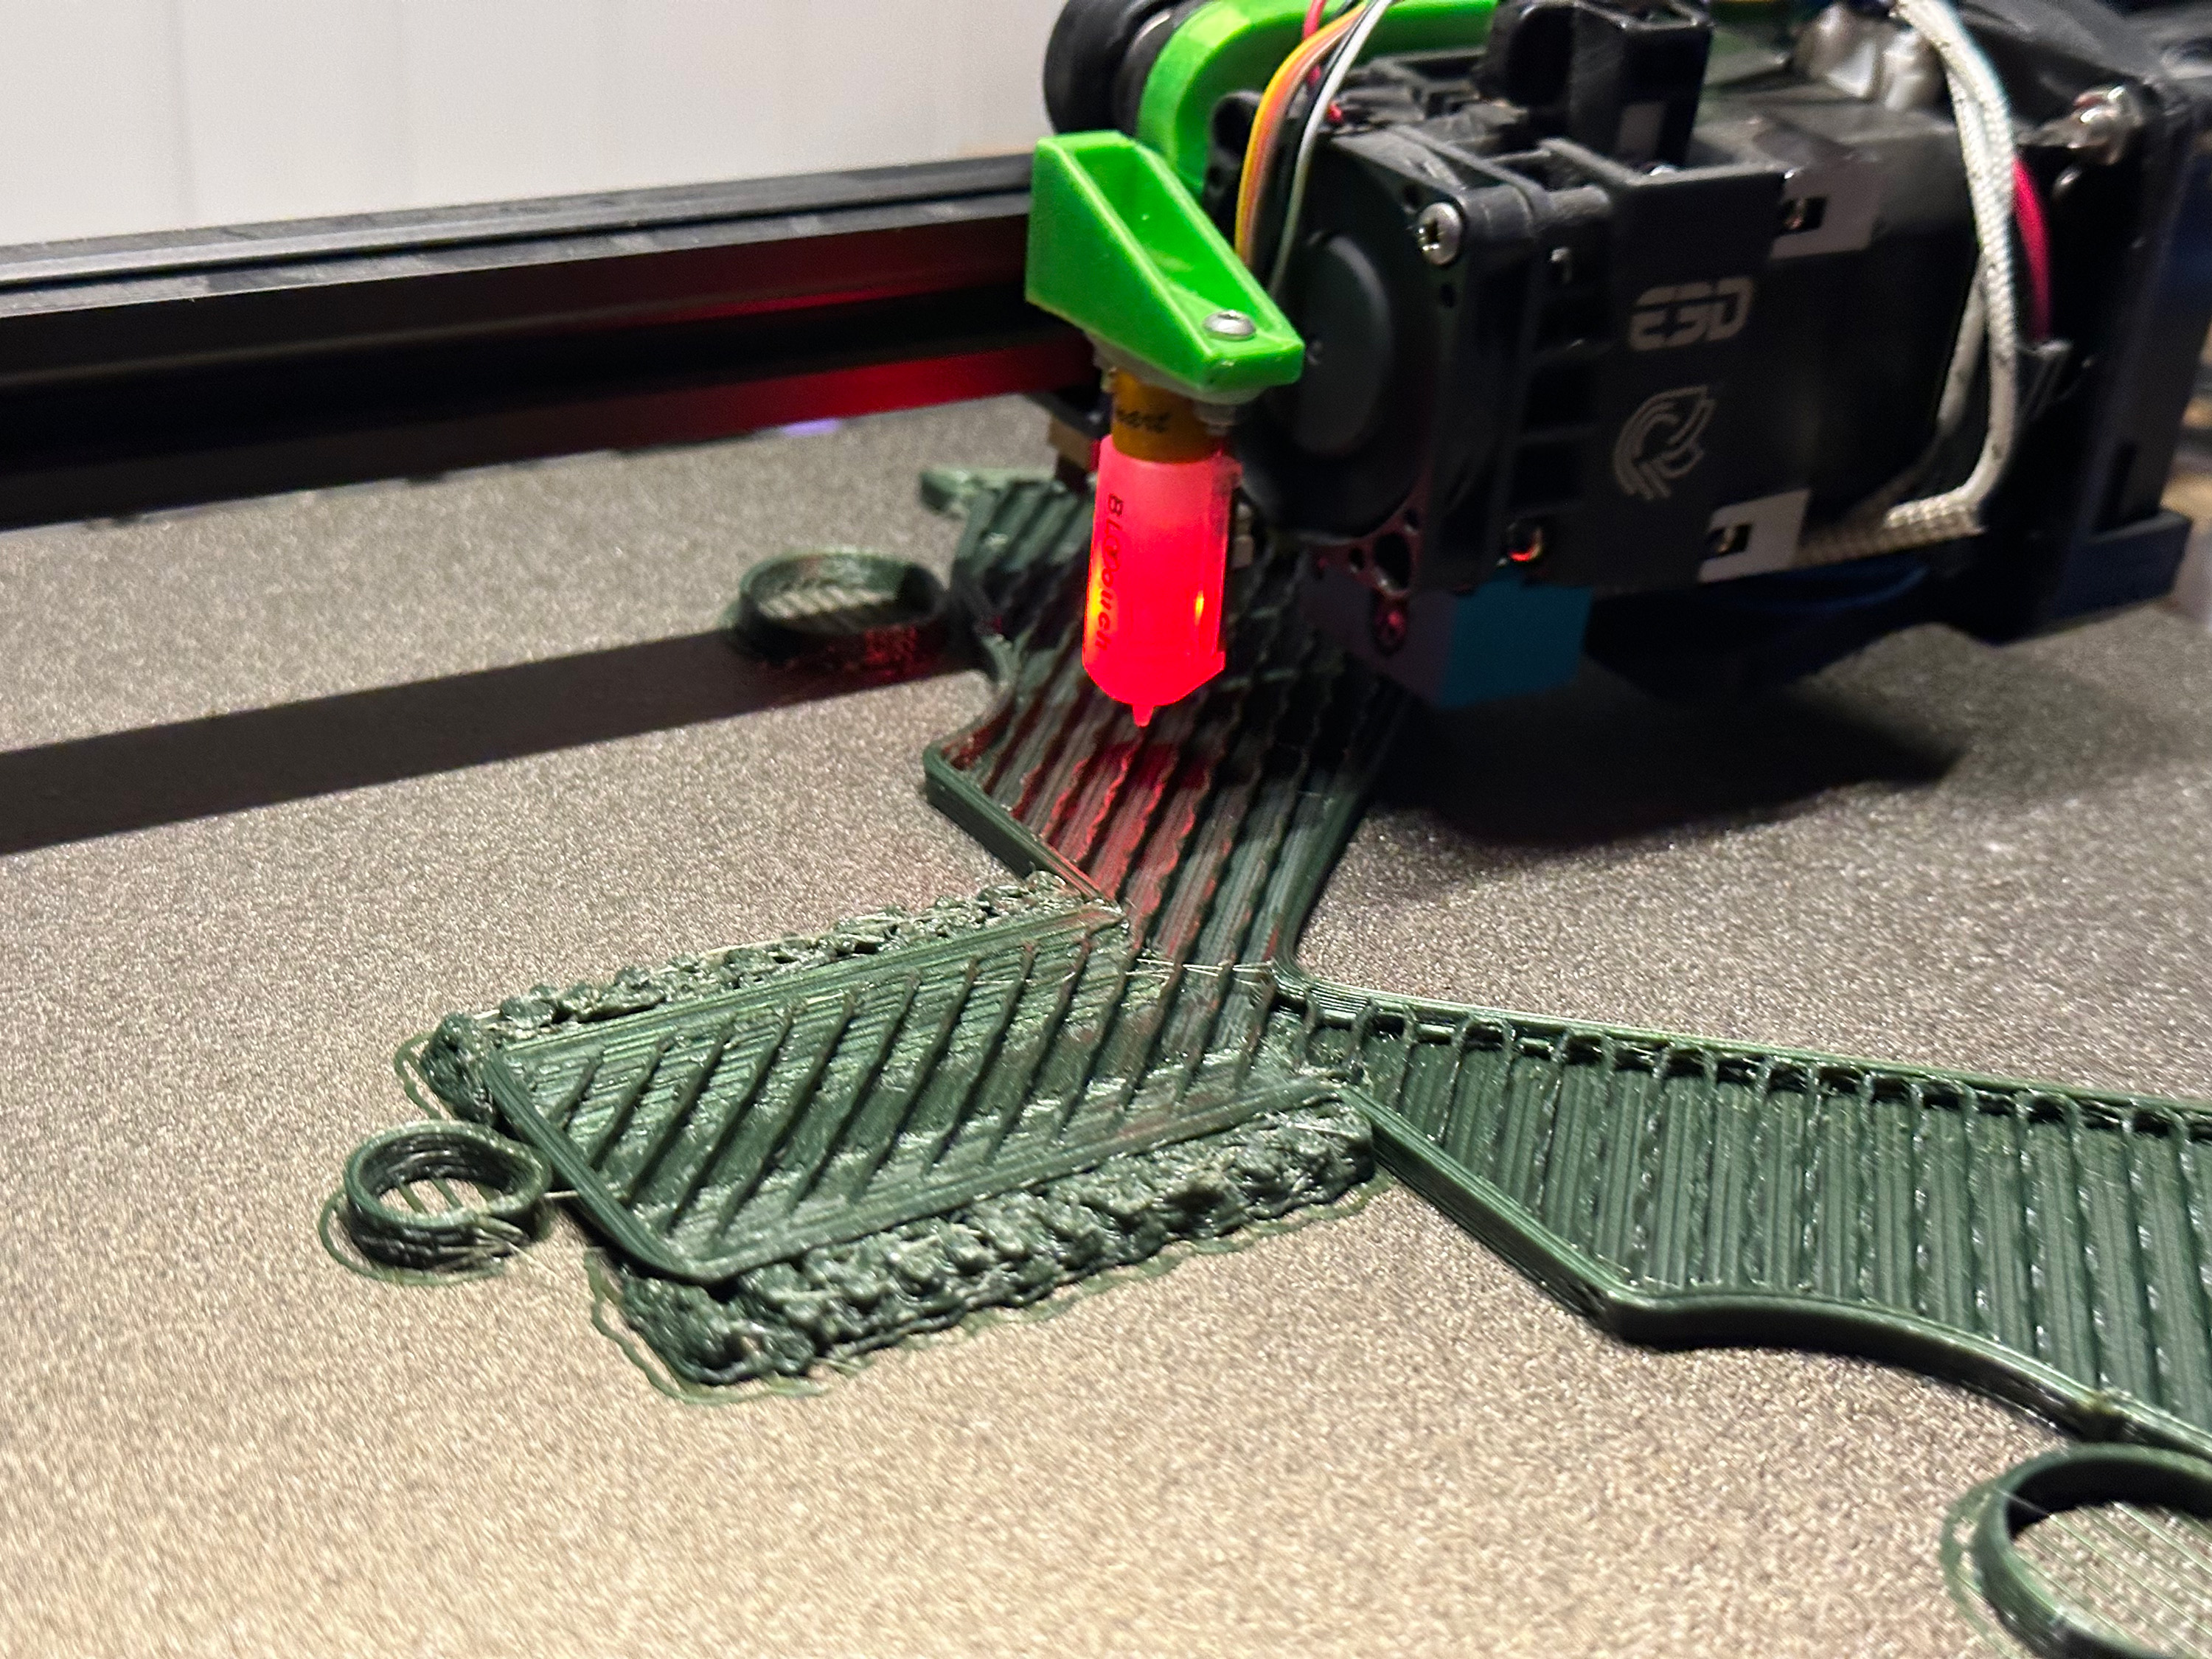
I modified the model again to flatten the bottom and reduce the amount of support material required. I also scaled it up slightly to allow the pipe to fit without altering the pipe itself. I allowed OrcaSlicer to add supports wherever it felt it was necessary and I restarted the print.
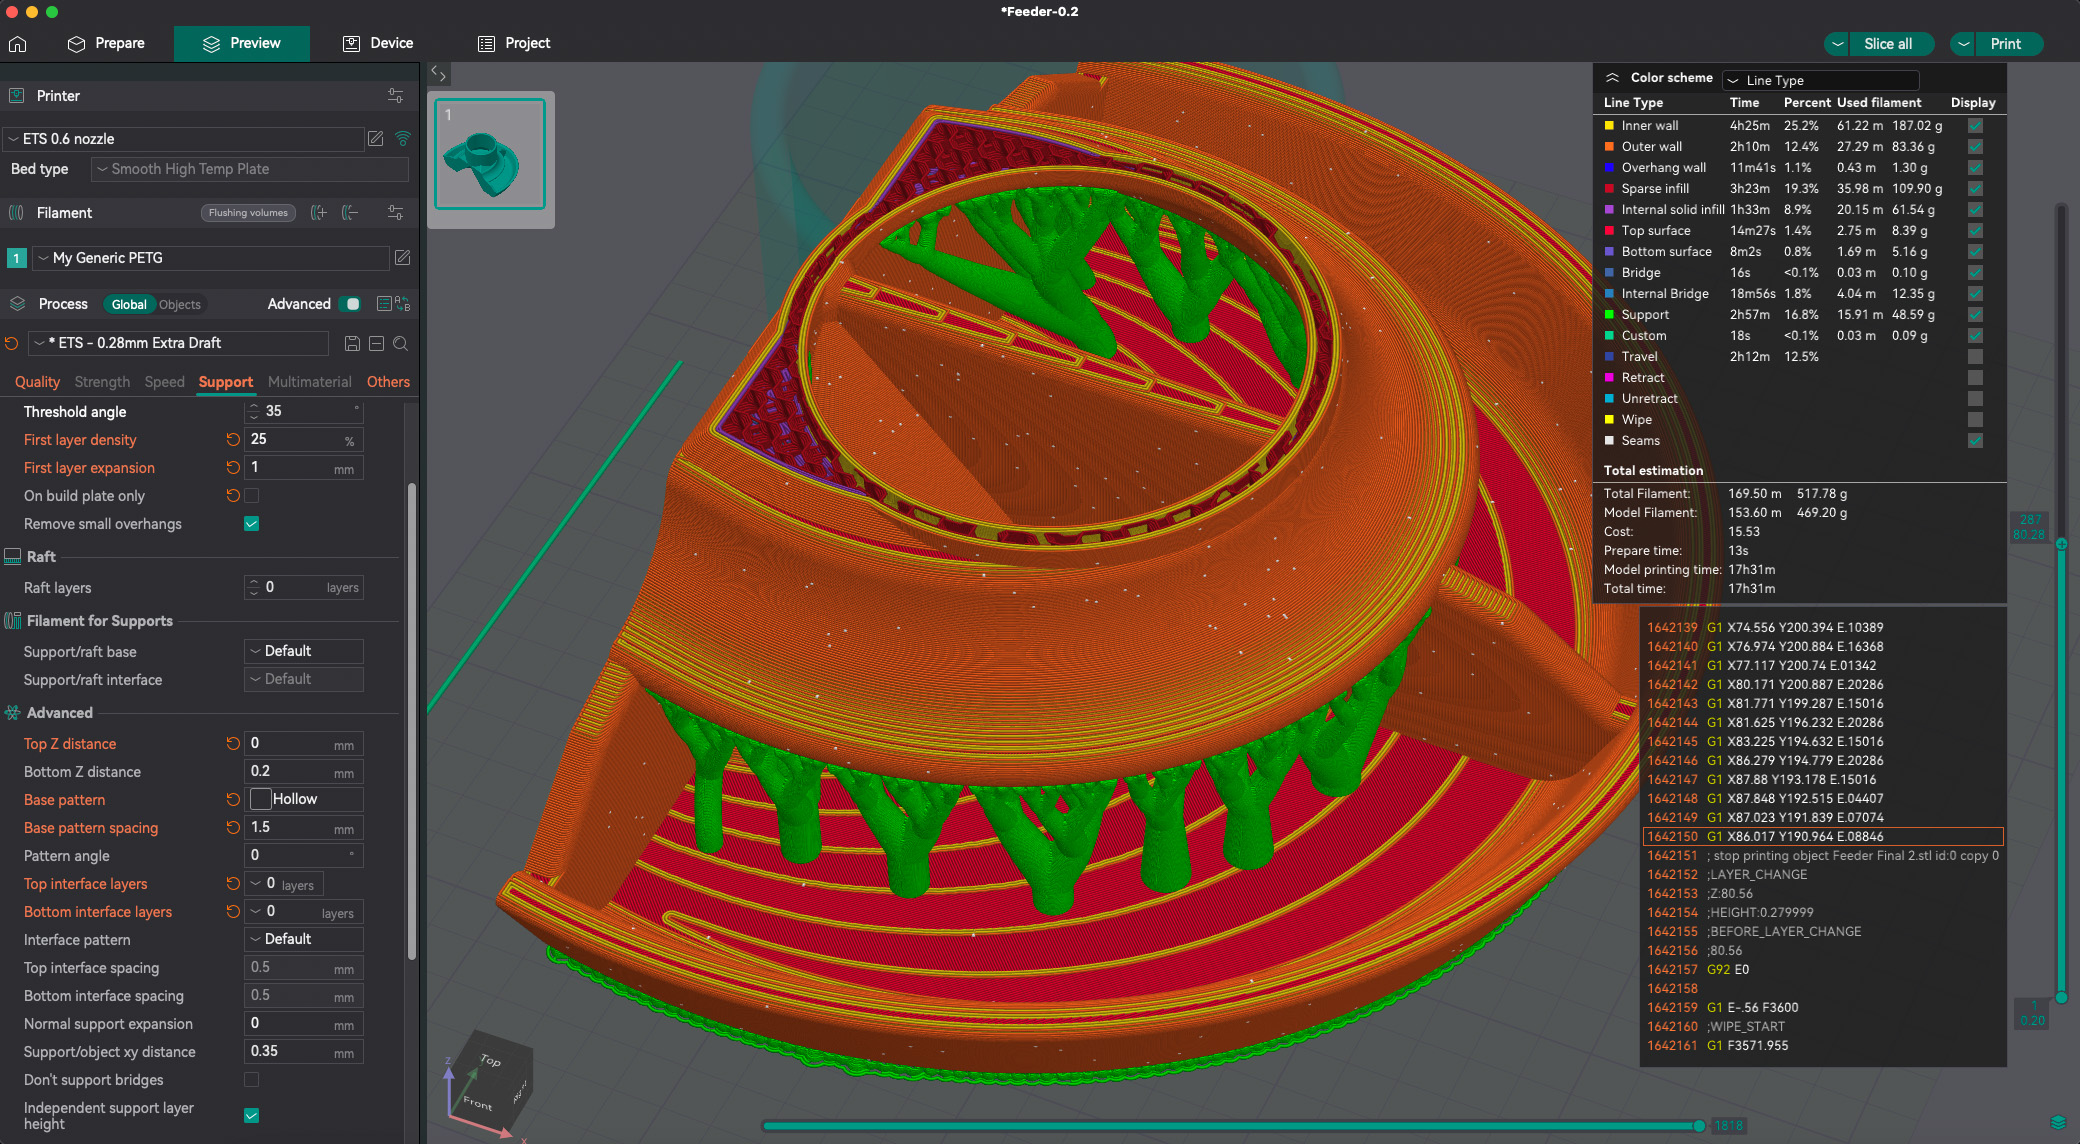
Some of the supports were inside the shell, but I was pretty confident that would be okay. Supports are easy to remove most of the time, right? Ha. No.
The good part is the printer was able to sustain the print from start to finish. The new thermistor did its job and continued to maintain the block temperature.
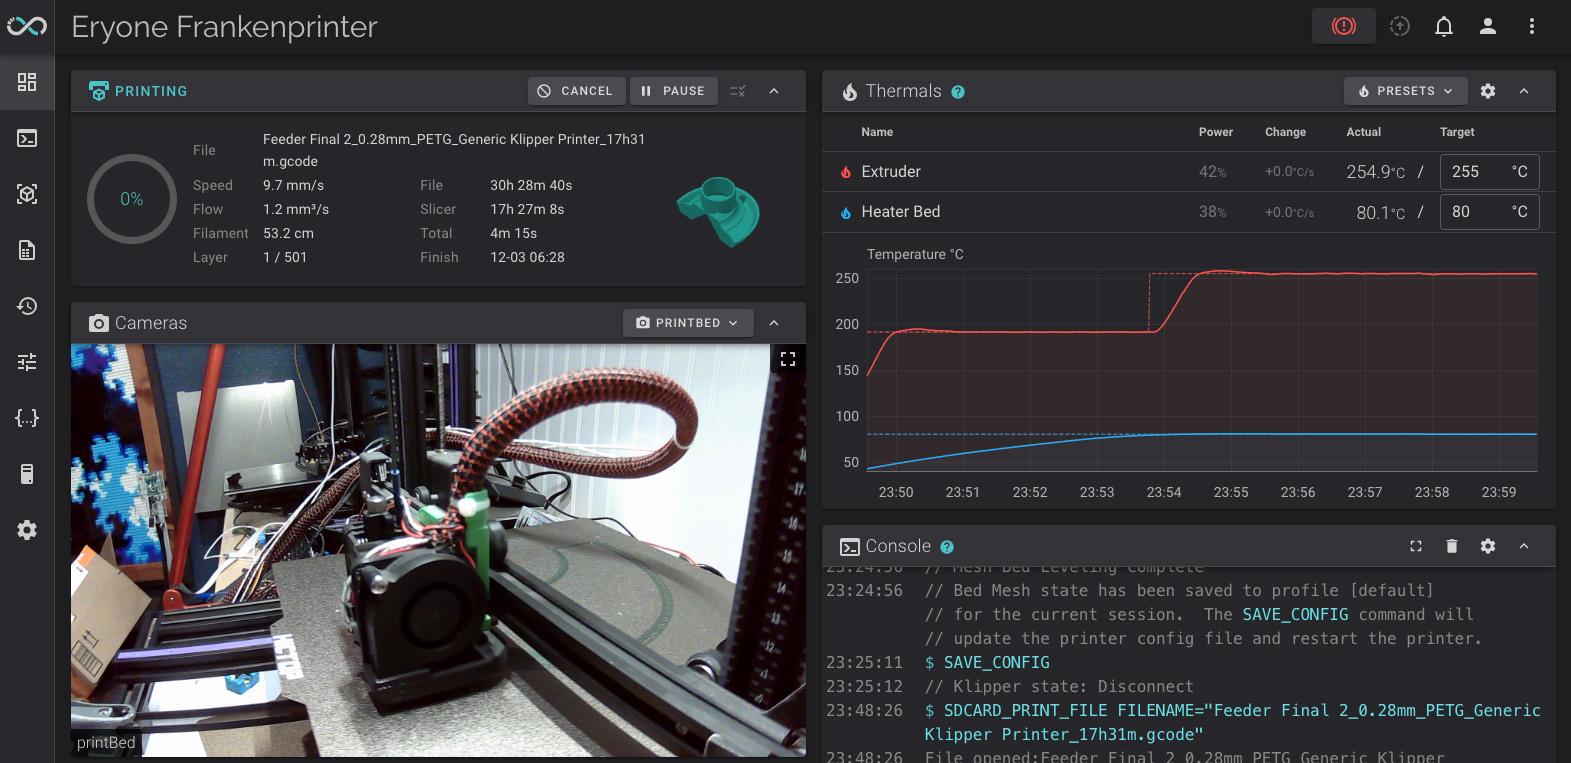
The print started at 12pm and finished the next day at around 5:30pm. The print was a little rough, but not terrible. The supports were exactly as designed. And the new springsteel build plate I bought recently off of Amazon made releasing the PETG model easy.

That's where the good part ends. The supports were terrible to remove. Nearly impossible, actually. I'm certain I had my settings setup incorrectly (since I'm brand new to OrcaSlicer) and I'm working to fix that for future iterations. Additionally, when we inserted the pipe, I had gone too far when resizing the model. I'm not sure if OrcaSlicer just accounts for filament shrinkage better, or if my measurements were just that far off. But there was quite a bit of space between the model and the pipe. We can use screws to make it work.
I removed as much of the supports as I could, and the model is still usable. So it's not a complete loss.
Iteration 3: Lying Down
And for my third iteration, I'm attempting to lay the model flat on it's back. I had considered this option before, but I was worried that the layer adhesion would be an issue with the feeder in this orientation. However, with the 0.6mm nozzle, all of these models are extremely solid. And our birds aren't going to stomp on the feeders and break them. So I altered the model one more time to flatten the tube slightly along the back. It would reduce the support material even more. And it would give the model a strong connection with the build plate.
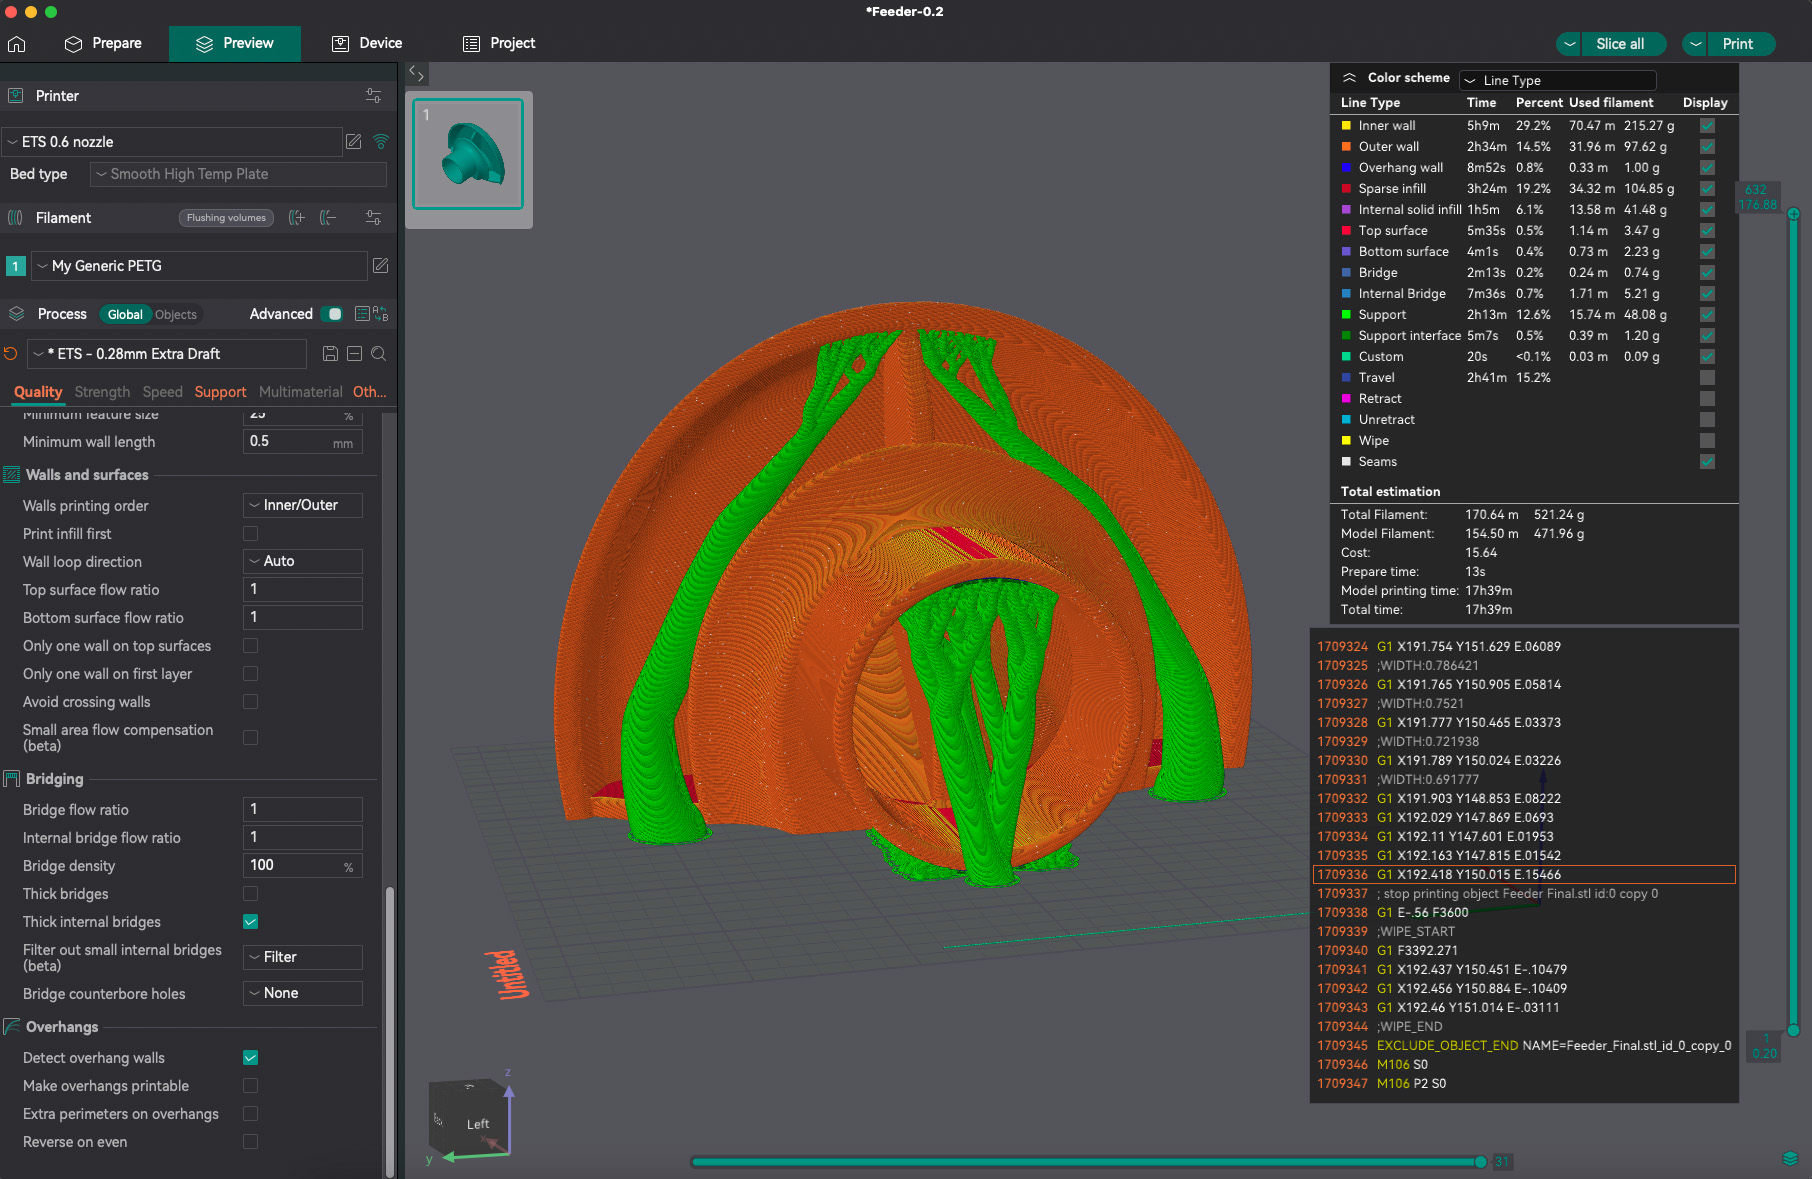
I followed guidance in this Reddit thread and altered the support settings to, I hope, make them easier to remove. They'll at least be in areas that are easier to reach.
This is currently printing and should be finished late tomorrow.