I did a lot of research in a lot of areas to find the right fit. Because I needed something that would run on either batteries or, at the very least, a low power source, I wanted to think low-power with the components, code, and the entire design of the sensor itself.
Choosing a microcontroller
There are many, many microcontrollers available. But since the sensor didn’t need to make decisions, or use complex logic, it seemed right to focus on Arduino devices. These types of devices are ideal for applications that require running the same logic on a loop, for as long as the device has power.
Additionally, I wanted to ensure I considered the size of the controller. These sensors would be placed in or near each plant that is connected to the system. Since plants are generally selected for their aesthetic, it didn’t seem like a good idea to create a sensor that was big or bulky.
Cost was also a factor. I have a LOT of plants. If I was going to be buying one of these for each of my plants, it would need to be fiscally possible to do so. It would need to run both the moisture sensor and the wireless module, though not necessarily at the same time.
It would also need great low-power mode option to allow the battery to feed the sensor. Ideally it would support deep sleep mode.
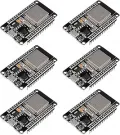
Based on my research, I selected the Seeeduino XIAO for this project. It doesn’t have deep sleep mode, but if the power LED is removed, in its standby state, the power consumption is about 0.016𝞵A. Additionally it operates on a 3.3v power supply. Which is possible to provide easily with many different battery configurations. Including introducing the possibility of using coin cell batteries.
Choosing a wireless technology
For the sensor, I continued applying my goals (low power, cheaply available components) to the project. For the wireless options, there was an additional requirement to have the system support the ability to wirelessly transmit its readings to the station. The transmission is only part of what was needed. I also wanted it to be simple to pair the sensor with the station without someone having to do any coding at all.
There are RF modules that use basic radio transmissions to send readings. They’re cheap, common, and there is a ton of information on setting them up. They’re easy to set up to connect with one another and they don’t use a ton of power.
There is bluetooth. However, usually bluetooth requires some kind of pairing direction between devices. This isn’t insurmountable. But they also don’t tend to have the same range as RF modules.
And Wifi just seemed like overkill for what I was doing. It’s slower to set up. More complicated. And I wanted the whole system to not require a network at all if I could.
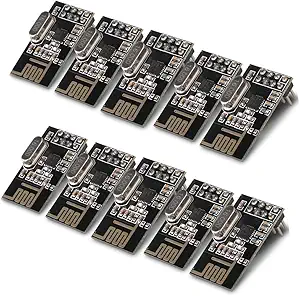
In the end I started off with NRF24L01+ 2.4GHz transceivers.
Choosing a moisture sensor
Searching for “arduino moisture sensor” will return all sorts of results. There is the classic, PCB-style sensor that is common. There are three designs there, a rectangular design (usually red) with exposed contacts, a design with two stakes that also has exposed metal contacts, and one that looks like a garden stake used to label plants. The last design is “capacitive” rather than “resistive” and since the contacts aren’t exposed, it seemed to have the longest reported usage time. Additionally, I liked how long that sensor was. Meaning it could be used for larger plants that would, perhaps have dryer soil near the top which it was still wet in lower layers of the soil. This is especially true of plants in larger pots.
Other designs of the “stake” style are offered through sites like Adafruit and Vegetronix but they are expensive and, again, I will need one of these per plant. 😬
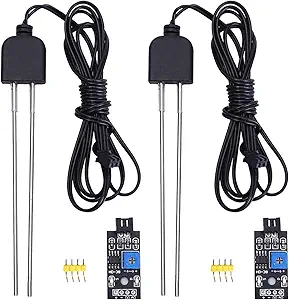
There’s another style that I saw when looking up moisture sensors. It’s a resistive sensor with a board, a connector, and a wire that leads to set of prongs that It was a bit more expensive, but I liked how the actual probe was separate from the electronics. There’s something in me that makes me hate the idea of keeping bare PCB boards so close to areas that will definitely be wet and dirty. Over time, those components will absolutely corrode. It would also allow the controller box itself to be placed outside of or near the plant. Even hidden within the plant if it’s large enough. The probes themselves are thin, and therefore less likely to damage roots when placed in the soil. And they’re longer. So they could more accurately read the moisture level of the soil.
I also saw that there were DIY options that could be made with a simple set of nails that were buried in the soil. They appealed to my sense of frugality and the nails (or any conductive surface) could be whatever length necessarily.
For my work, I’m starting with two types:
- The two-prong resistive sensor
- The single stake capacitive sensor
Choosing a power source
In order to keep the form-factor small, I started looking into coin cell batteries. These are what I already use in my Govee hygrometers that I use all over my house. But they have some drawbacks. One, they have a low capacity (around 620mAh) and the readily available versions aren’t rechargeable. You can get rechargeable versions, but they have an even lower capacity. They start off providing 3V, which is already lower than the 3.3V needed by the Arduino. While it can operate on a lower voltage, that will only last a short amount of time. For reference a single, AA battery that you can readily find has about 2000mAh. But those batteries only offer 1.5V. The Seeeduino XIAO’s operating voltage is 1.62-3.63V. An the moisture sensors have a minimum operating voltage of 3.3V.
For my first setup, I decided to go with common components. I will be using USB power to start so I can also have access to serial monitoring. But once I’m ready to run the test, I’ll run the whole system off of two AA batteries.