Welcome to Multi-Level Nerd. Today’s post features 3-D printing.
Hey everyone! I’m Melissa and I’ve always been interested in making things and understanding how things work. Over the past couple of years, I’ve gotten into 3-D printing. Like many people who picked up a cheap Ender 3 Pro, I spent a lot of that time figuring out what I was doing and ended up pouring a lot of my print hours into customizations for this printer.
However, I hadn’t made very many practical prints with this new printer. Don’t get me wrong, I love the different, fun models people make with their printers, but I really wanted to make useful things as well.
Enter this.
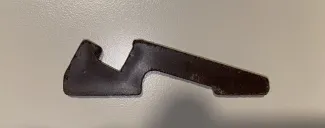
This is a stand for a game my parents have had for many, many years. It’s called Rummy Cube and my sister and I have gotten hooked on it again. Since this game is old, it’s seen a lot of use. You can see that it’s chipped and very worn. For the most part this doesn’t matter because it’s still pretty functional. However, we are also missing some of these stands and that leads to some…interesting workarounds to keep the stands upright. And when those workarounds fail, the tiles go everywhere.
Then I thought, “Hey, I can print one of those.”
Tracing
So I had to figure out how I was going to reproduce this. The shape itself isn’t a simple one, but if you take advantage of its topology, then it’s really just a hook shape that’s extruded to a certain depth (or height).
So I took a photograph using my cell phone (see above). It was tricky because it don’t have a photo setup to minimize shadows, but I got a workable copy in the end.
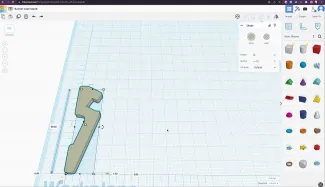
Once I had the photo, I needed to trace it. I decided to do this in Illustrator, but you can use your vector software of choice. It does have an auto trace option, but I didn’t really want to deal with all of the extra inflection points it adds. So, I opted to do it manually.
Once it was traced, I imported the final PNG into tinkercad to apply the height and generate the STL. I used my digital calipers to measure the depth and used that to create the 3-D model.
Printing
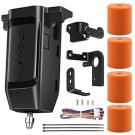
Once the STL was created, I imported the file to Cura and setup a print of two of the legs on my Ender 3 Pro with the Sprite Pro direct drive extruder.

I went ahead and used a silk PLA I had lying around from a previous print job. This is a great way to use up filament when you don’t have enough left on the spool to finish a big project.
I'm using the upgraded Creailty v4.2.7 motherboard for my Ender 3 Pro combined with a Raspberry Pi 3. The Raspberry Pi has Klipper installed and I'm using Fluidd as the UI to monitor and control my printer.
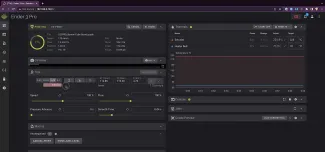
Since the upgrade, using the printer has been a lot easier. With Klipper and Fluidd, I'm able to print directly from Cura to the printer and have it start printing immediately. No more messing around with SD cards.
Reveal
And here they are. The finished legs. 🎉
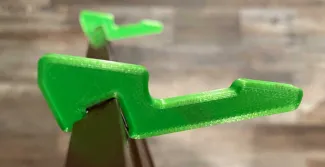
I was very pleased with how these turned out. They worked great and I’m going to print them out in a few different colors so each player can have a different color for their stand.
And you can see that the legs themselves very closely match the original leg.
Wrap up
And there you have it. The 3-D printed legs are working well and now I can print more whenever I need them. But, most importantly, I was able to fix an annoying problem very quickly.
If I had this to do again, I would probably add some chamfers to the print to make the edges less sharp. But one swipe with the debuting tool took care of that on this pair.
I hope you enjoyed this short post and that you’re inspired to make something today. I’d love to hear from you in the comments on YouTube or through the contact form. Constructive criticism is always welcome.
Thanks for reading!